> ## Documentation Index
> Fetch the complete documentation index at: https://docs.robot-learning.co/llms.txt
> Use this file to discover all available pages before exploring further.
# 1. Unboxing & Setup
> Getting started with your TRLC-DK1
# What's included
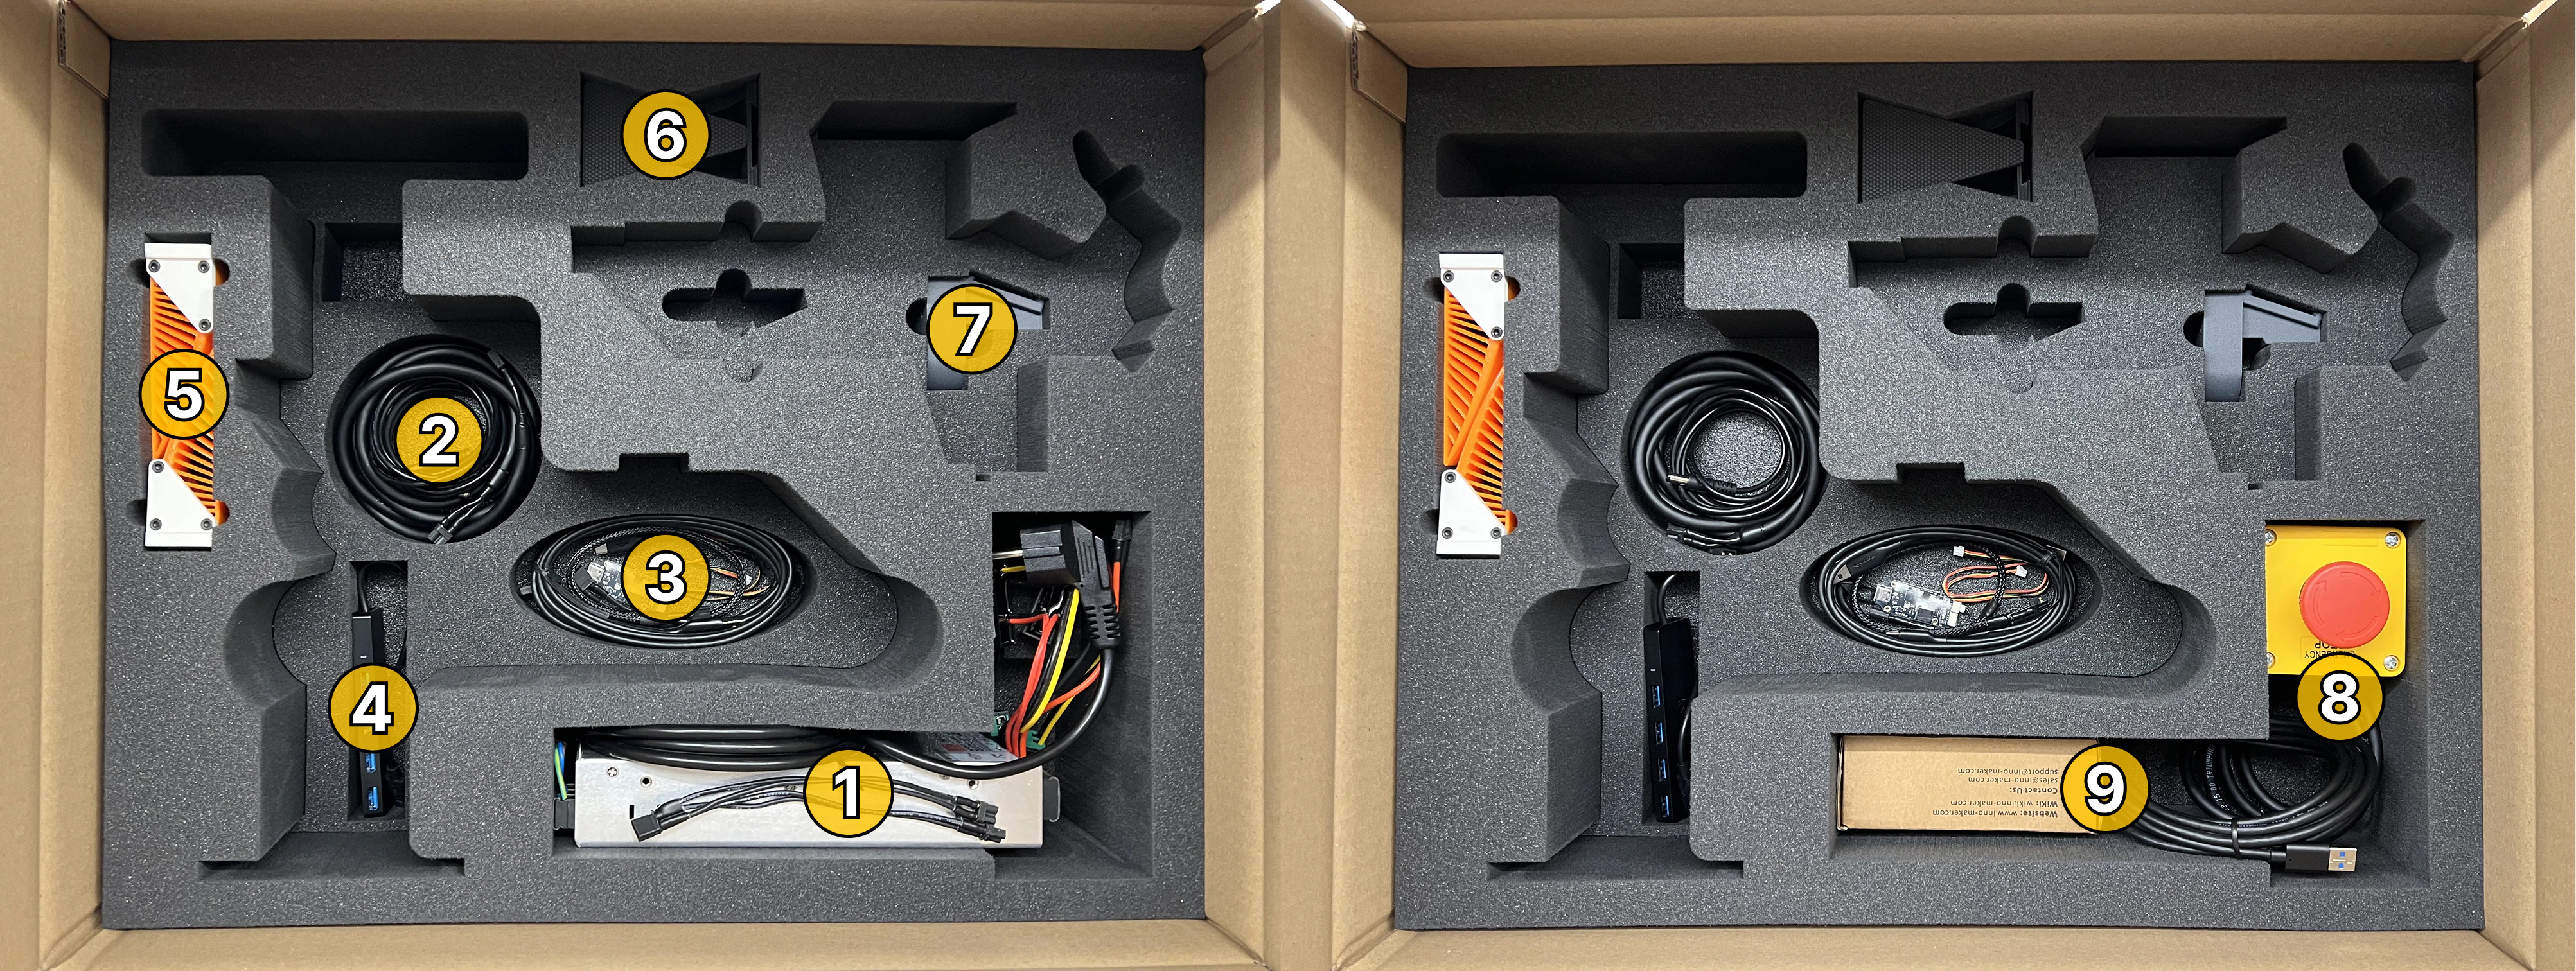 After the TRLC-DK1 Leader and Follower are removed from the box, you're going to see these accessories:
1. Power supply (Solo: 200W / Bimanual: 450W) and power Y-splitter
2. Leader and follower power cables
3. USB 2.0 cables (leader and follower), USB-to-CAN adapter, 3-pin debug cable
4. USB 3.0 Hub
5. TPU Fingers (soft)
6. PLA Fingers (stiff)
7. Alternative base for leader arm (for mounting on a 3/8" microphone stand)
8. E-Stop
9. Context Camera (incl. 3m USB 3.0 cable)
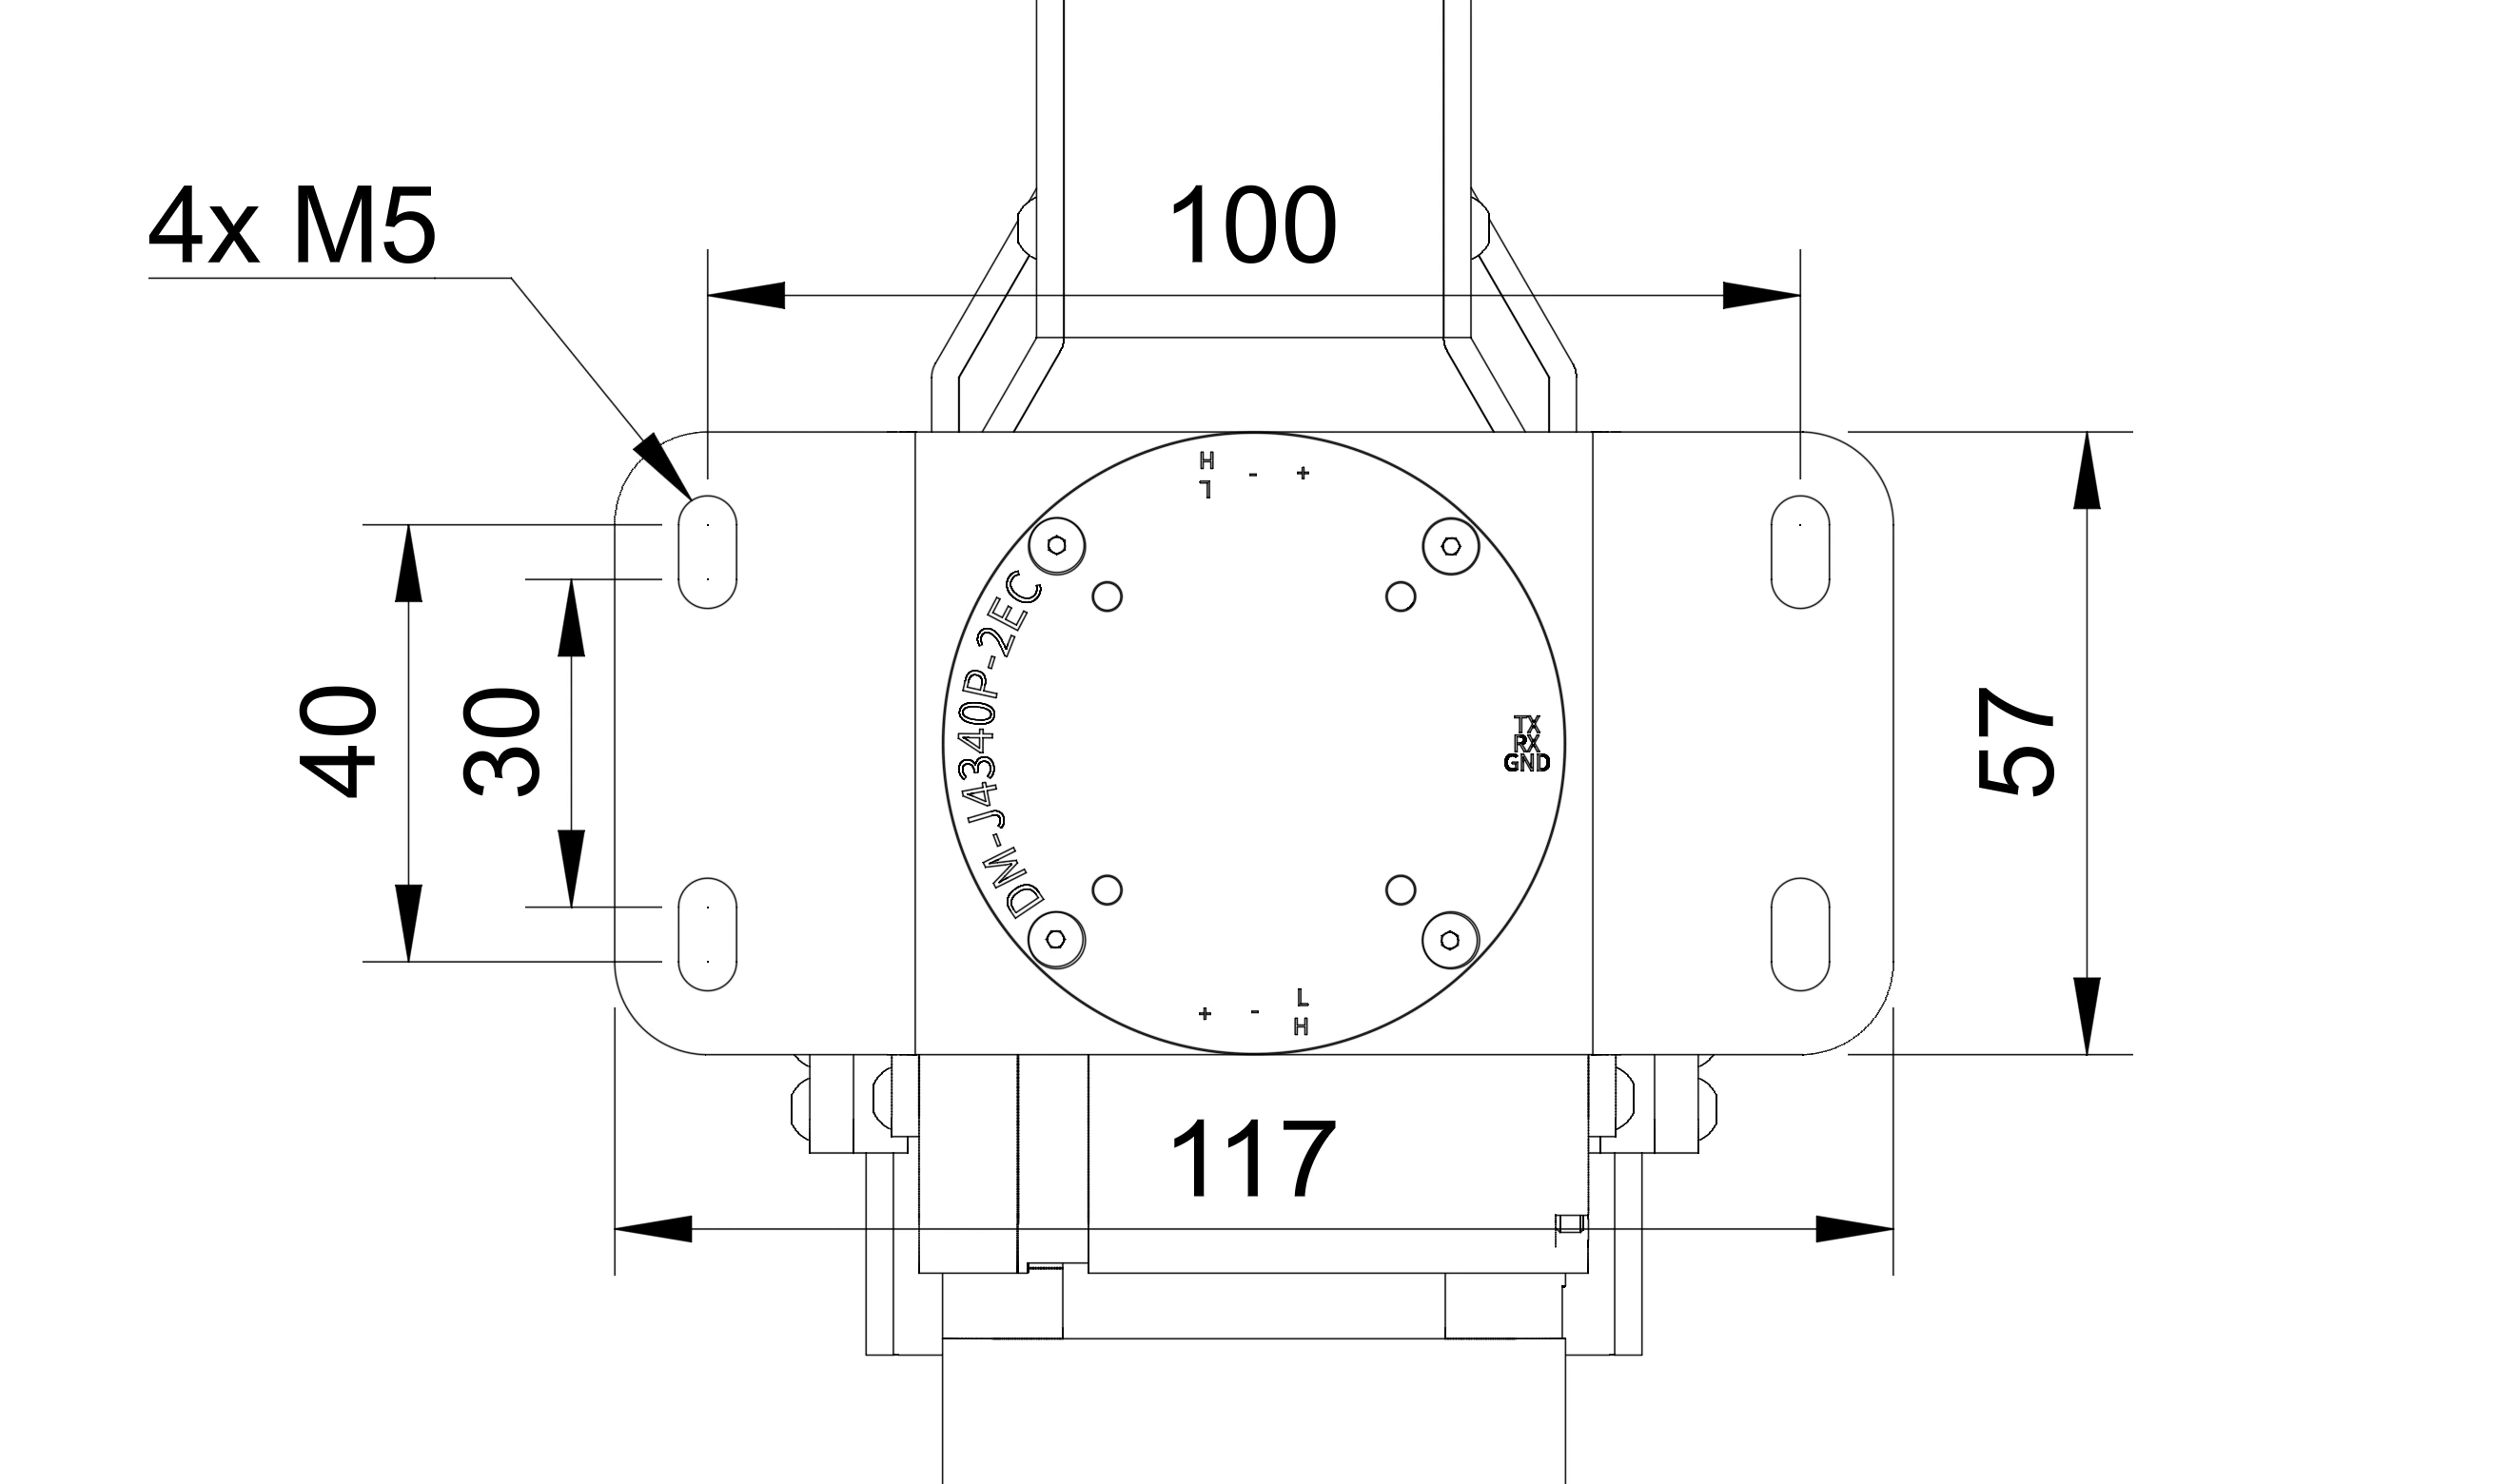
# Mechanical Setup
There are two recommended options to mount TRLC-DK1:
with WORKPRO quick-release clamps
with M5 screws on 3060 or 4080.
For custom mounting methods please refer to the following measurements:
After the TRLC-DK1 Leader and Follower are removed from the box, you're going to see these accessories:
1. Power supply (Solo: 200W / Bimanual: 450W) and power Y-splitter
2. Leader and follower power cables
3. USB 2.0 cables (leader and follower), USB-to-CAN adapter, 3-pin debug cable
4. USB 3.0 Hub
5. TPU Fingers (soft)
6. PLA Fingers (stiff)
7. Alternative base for leader arm (for mounting on a 3/8" microphone stand)
8. E-Stop
9. Context Camera (incl. 3m USB 3.0 cable)
# Mechanical Setup
There are two recommended options to mount TRLC-DK1:
with WORKPRO quick-release clamps
with M5 screws on 3060 or 4080.
For custom mounting methods please refer to the following measurements:
 # Electrical Setup
These are all power connections for a single leader-follower pair:
# Electrical Setup
These are all power connections for a single leader-follower pair:
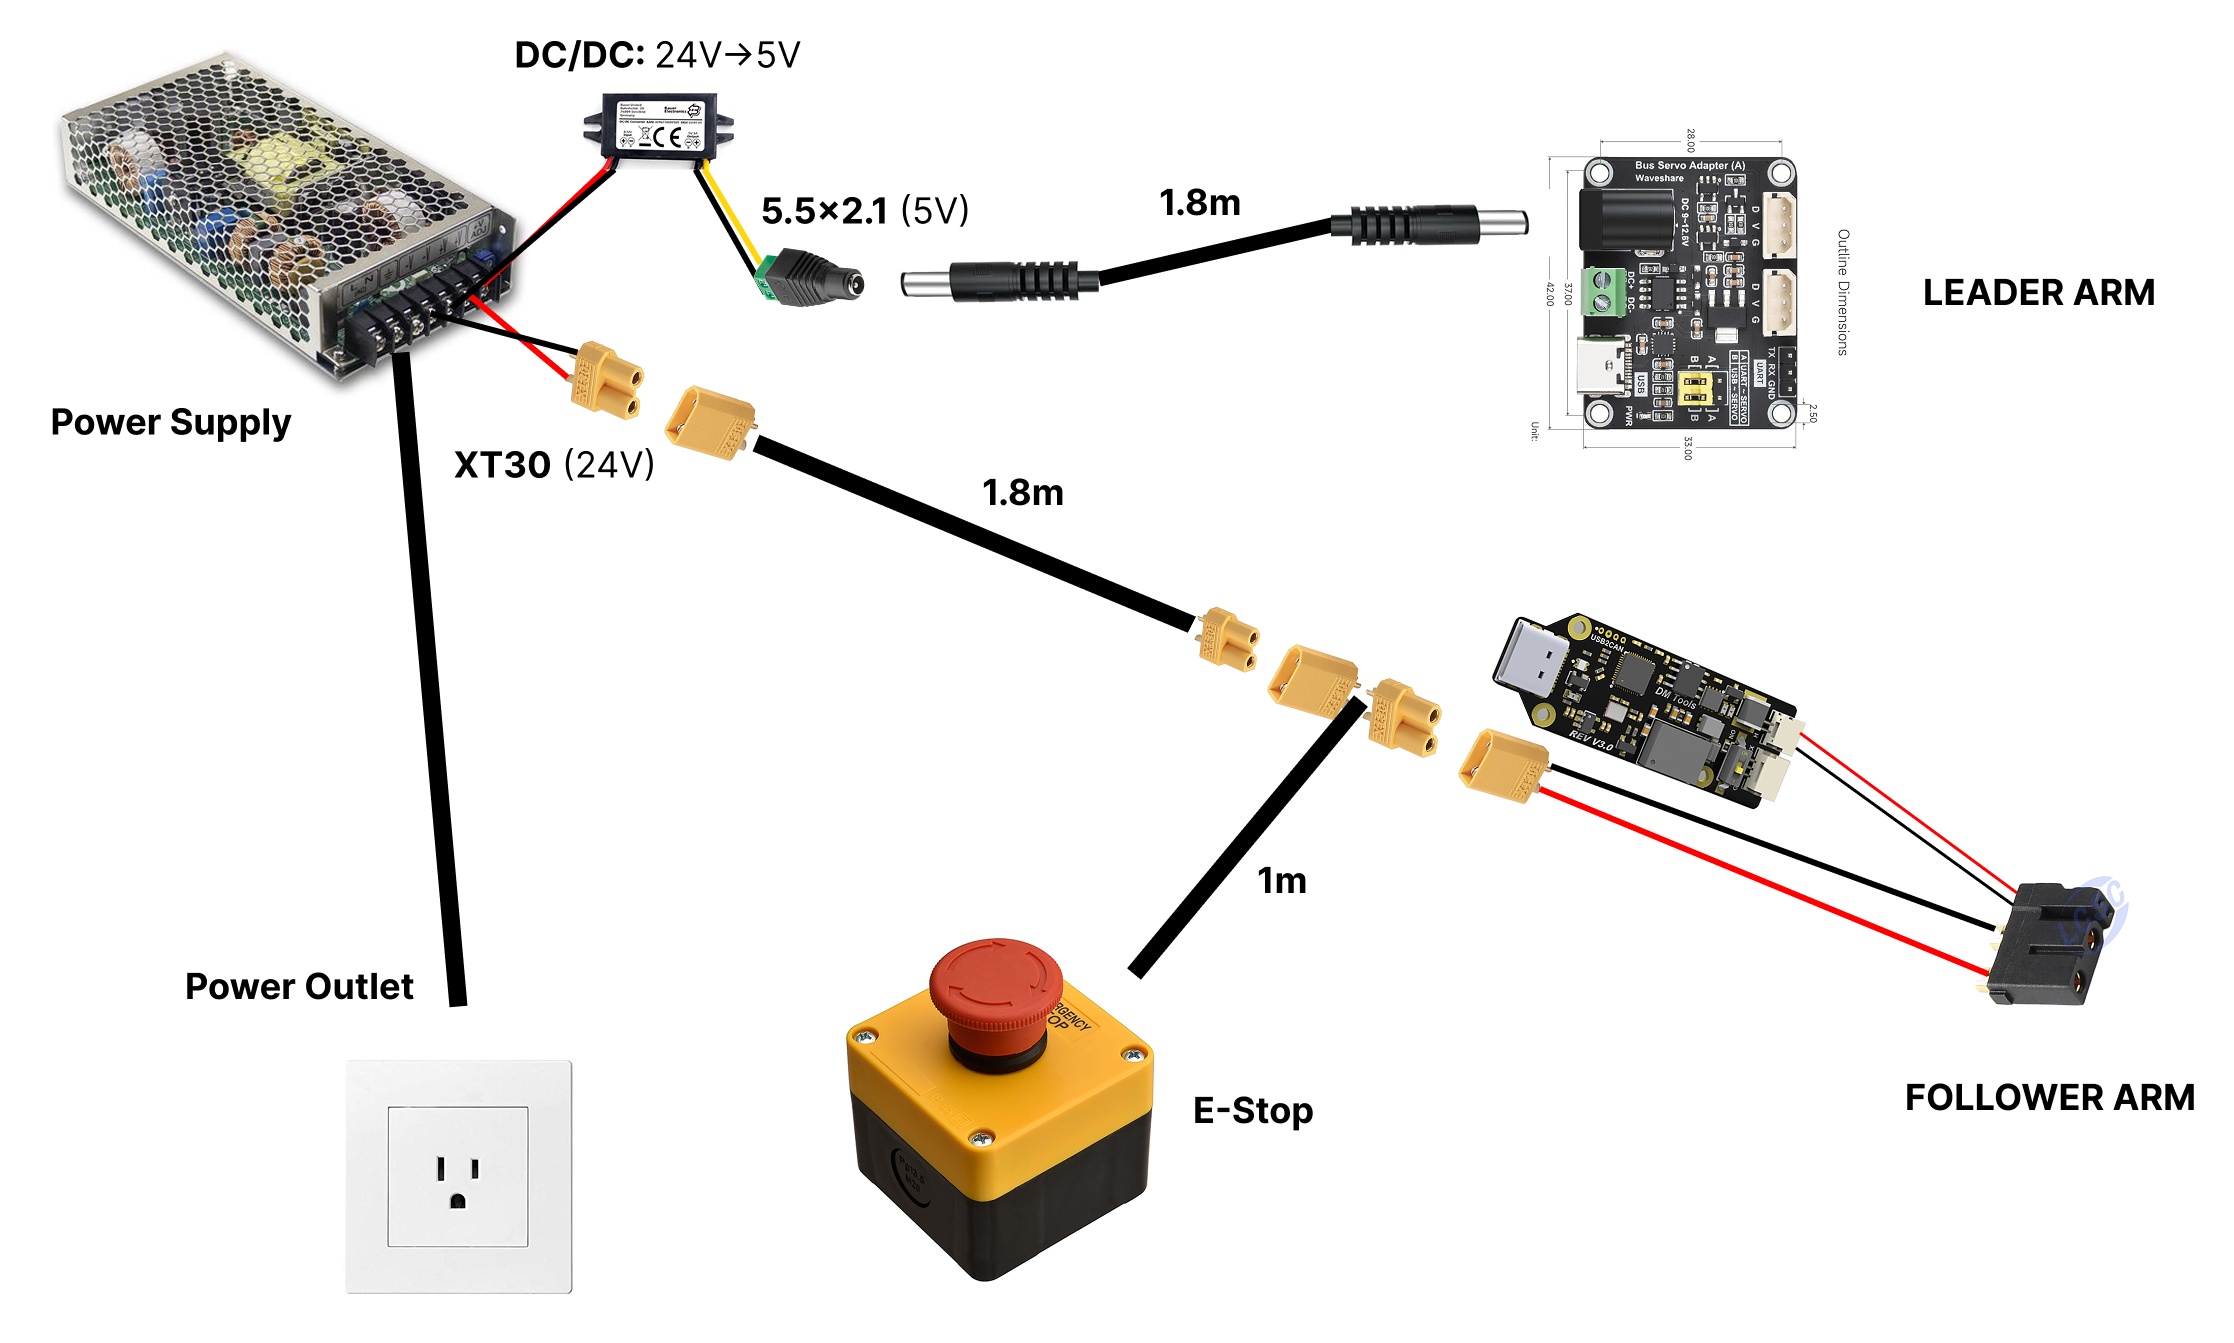 All data transmission runs through USB-C cables. Note that every follower arm needs two USB cables; one for CAN adapter and one for the wrist camera.
For a bimanual kit you will need to connect up to **seven USB cables** to your computer (2x Follower, 2x Wrist Cams, 2x Leaders, 1x Context).
Make sure that your computer's USB ports support the required bandwidth (at least USB 3.0)
All data transmission runs through USB-C cables. Note that every follower arm needs two USB cables; one for CAN adapter and one for the wrist camera.
For a bimanual kit you will need to connect up to **seven USB cables** to your computer (2x Follower, 2x Wrist Cams, 2x Leaders, 1x Context).
Make sure that your computer's USB ports support the required bandwidth (at least USB 3.0)